Charging Performance
The charging performance page (/charging/performance) shows how you charge: energy totals, efficiency trends, AC vs DC split, and estimated fast-charging curves for the active vehicle.
Renamed from Energy
This page was /charging/energy in earlier releases. The route and sidebar label changed in v0.3 to better match what the page shows and to keep it separate from Driving Performance.
Date Range Filter
A filter bar at the top lets you scope everything on the page to 7d, 30d, 90d, YTD, 1y, or All, or a custom From/To date pair. The selection is passed in the URL (?range=… or ?date_from=…&date_to=…) and shared with other analytics pages.
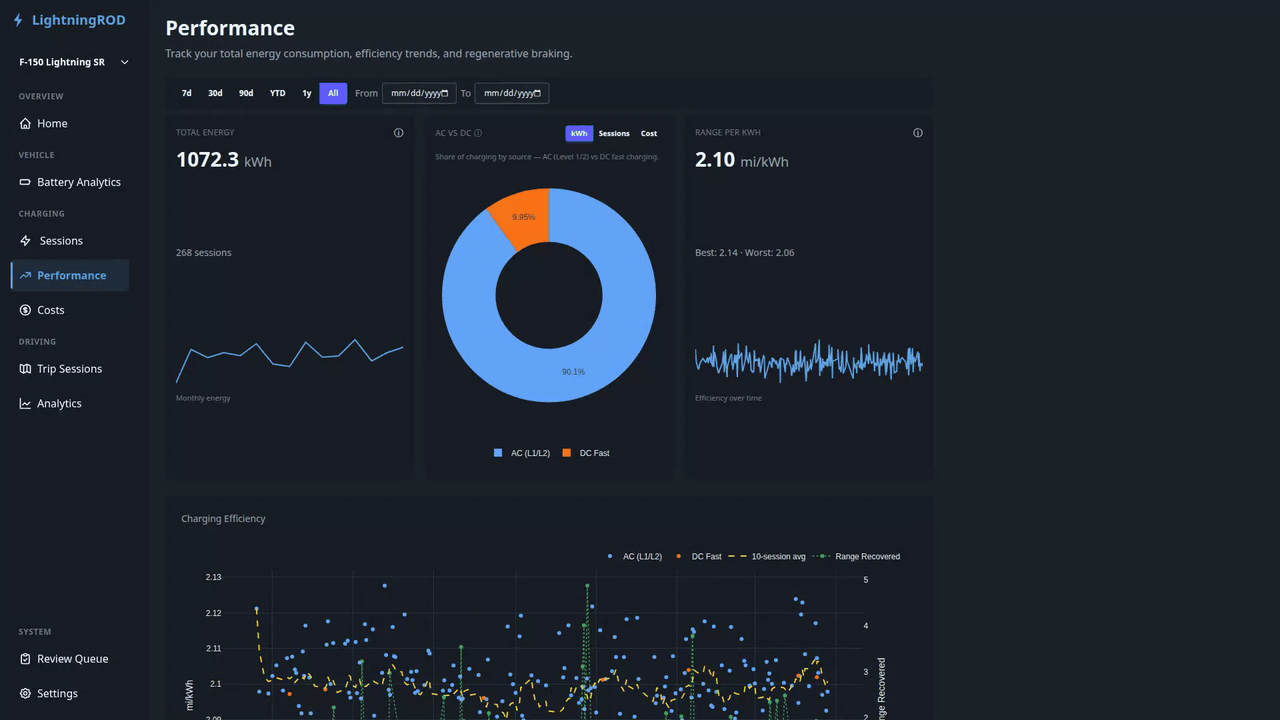
Summary Row
Three summary tiles sit at the top:
- Total Energy — kWh delivered in the current range
- AC vs DC Energy -- donut chart splitting energy by charge type. A small chip toggle above the donut switches the metric between kWh, Sessions, and Cost. Range recovery now lives on the Driving Performance page.
- Avg Efficiency — average mi/kWh (US) or km/kWh (metric) across sessions in range
Charging Efficiency Trend
An interactive scatter chart showing efficiency per session over time:
- Individual session points colored by charge type
- Rolling 10-session average overlay
- Optional regen overlay on a second axis when trip regen data is available
Renamed
Previously called "Efficiency Trend". The new name makes it clear that this chart is about charging, not driving.
Monthly Energy by Type
A stacked bar chart of monthly kWh totals, broken out by charge type (AC vs DC).
Synthetic DC Charge Curve
Below the monthly chart, a synthetic aggregate DC charge curve shows average fast-charging behavior across DC sessions in the current range. It is based on peak power, taper points, and session count, not a direct measurement.
- X-axis: SOC %
- Y-axis: kW
- Badge: a small "Synthetic" badge shows that the curve is modeled, not recorded
- Fallback only: the curve appears only when no recorded DC sessions have detailed
battery_statustelemetry. If real curve points exist, use the Battery Analytics page's per-session chart instead. - DC only: AC sessions are excluded because AC curves are effectively flat.
Use this card to get a quick sense of taper behavior even when you have not captured full telemetry for every fast charge.